Introduction 00:00
Now that we know how to use particles, we could create something cool like a Galaxy. But instead of producing just one galaxy, let's do a galaxy generator.
For that, we're going to use lil-gui to let the user tweak the parameters and generate a new galaxy on each change.
Setup 00:23
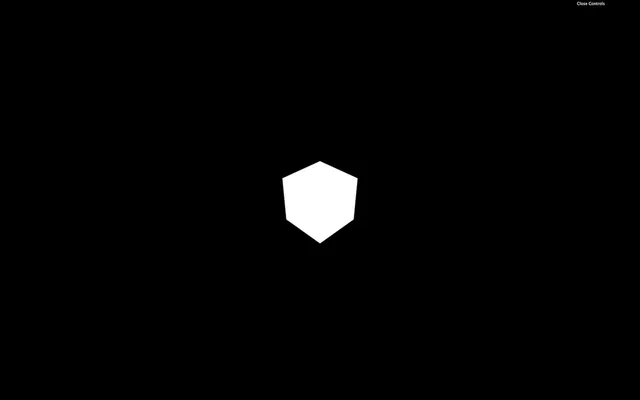
The starter is only composed of a cube in the middle of the scene. It ensures that everything is working.
Base particles 00:51
First, remove the cube and create a generateGalaxy function. Each time we call that function, we will remove the previous galaxy (if there is one) and create a new one.
We can call that function immediately:
/**
 * Galaxy
 */
const generateGalaxy = () =>
{

}

generateGalaxy()
We can create an object that will contain all the parameters of our galaxy. Create this object before the generateGalaxy function. We will populate it progressively and also add each parameter to lil-gui:
const parameters = {}In our generateGalaxy function, we're going to create some particles just to make sure that everything is working. We can start with the geometry and add the particles count to the parameters:
const parameters = {}
parameters.count = 1000

const generateGalaxy = () =>
{
    /**
     * Geometry
     */
    const geometry = new THREE.BufferGeometry()

    const positions = new Float32Array(parameters.count * 3)

    for(let i = 0; i < parameters.count; i++)
    {
        const i3 = i * 3

        positions[i3    ] = (Math.random() - 0.5) * 3
        positions[i3 + 1] = (Math.random() - 0.5) * 3
        positions[i3 + 2] = (Math.random() - 0.5) * 3
    }

    geometry.setAttribute('position', new THREE.BufferAttribute(positions, 3))
}
generateGalaxy()
That's the same code as before, but we handled the loop a little differently.
We can now create the material by using the PointsMaterial class. This time again, we can add tweaks to the parameters object:
parameters.size = 0.02

const generateGalaxy = () =>
{
    // ...

    /**
     * Material
     */
    const material = new THREE.PointsMaterial({
        size: parameters.size,
        sizeAttenuation: true,
        depthWrite: false,
        blending: THREE.AdditiveBlending
    })
}
Finally, we can create the points by using the Points class and add it to the scene:
const generateGalaxy = () =>
{
    // ...

    /**
     * Points
     */
    const points = new THREE.Points(geometry, material)
    scene.add(points)
}

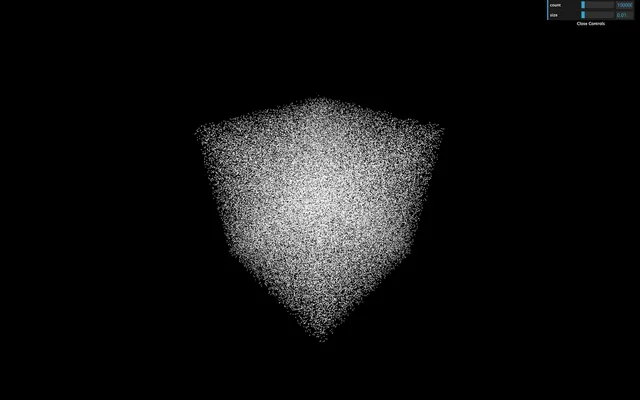
You should see few points floating around.
Tweaks 12:18
We have already two parameters, count and size. Let's add them to the lil-gui instance that we already created at the start of the code. As you can imagine, we must add those tweaks after creating the parameters:
parameters.count = 1000
parameters.size = 0.02

gui.add(parameters, 'count').min(100).max(1000000).step(100)
gui.add(parameters, 'size').min(0.001).max(0.1).step(0.001)

You should have two new ranges in the tweaks but changing them doesn't generate a new galaxy. To generate a new galaxy, you must listen to the change event. More precisely to the finishChange event to prevent generating galaxies while you are drag and dropping the range value:
gui.add(parameters, 'count').min(100).max(1000000).step(100).onFinishChange(generateGalaxy)
gui.add(parameters, 'size').min(0.001).max(0.1).step(0.001).onFinishChange(generateGalaxy)
This code won't work because the generateGalaxy doesn't exist yet. You must move those tweaks after the generateGalaxy function.

Be careful, we still have a problem, and if you play too much with the tweaks, your computer will start to heat. It's because we didn't destroy the previously created galaxy. We are creating galaxies one above the other.
To make things right, we must first move the geometry, material and points variables outside the generateGalaxy.
let geometry = null
let material = null
let points = null

const generateGalaxy = () =>
{
    // ...

    geometry = new THREE.BufferGeometry()

    // ...

    material = new THREE.PointsMaterial({
        size: parameters.size,
        sizeAttenuation: true,
        depthWrite: false,
        blending: THREE.AdditiveBlending
    })

    // ...

    points = new THREE.Points(geometry, material)

    // ...
}
Then, before assigning those variables, we can test if they already exist. If so, we can call the dispose() method on the geometry and the material. Then remove the points from the scene with the remove() method:
const generateGalaxy = () =>
{
    // Destroy old galaxy
    if(points !== null)
    {
        geometry.dispose()
        material.dispose()
        scene.remove(points)
    }

    // ...
}
Instead of using a texture that can create depth and alpha issues as we saw in the previous lesson, we will just let the default square shape. Don't worry; there will be so many small particles that we won't notice that they are squares.
Now that we can estimate how much particles we can have and their size, let's update the parameters:
parameters.count = 100000
parameters.size = 0.01
Shape 23:29
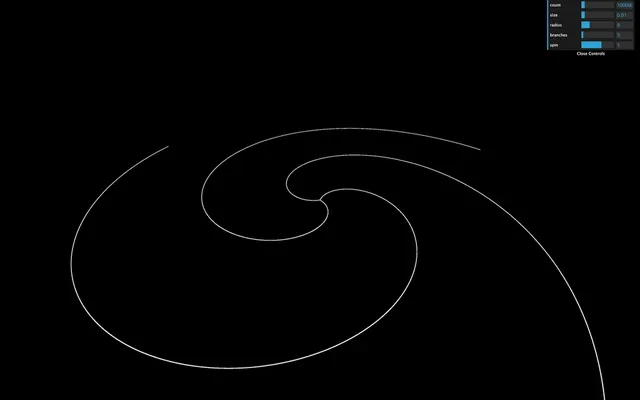
Galaxies can have several different shapes. We will focus on the spirals one. There are many ways to position the particles to create a galaxy. Feel free to try your way before testing the lesson way.
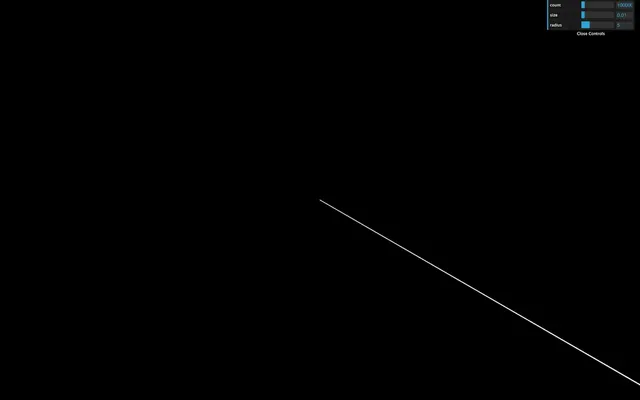
Radius
First, let's create a radius parameter:
parameters.radius = 5

// ...

gui.add(parameters, 'radius').min(0.01).max(20).step(0.01).onFinishChange(generateGalaxy)
Each star will be positioned accordingly to that radius. If the radius is 5, the stars will be positioned at a distance from 0 to 5. For now, let's position all the particles on a straight line:
for(let i = 0; i < parameters.count; i++)
{
    const i3 = i * 3

    const radius = Math.random() * parameters.radius

    positions[i3    ] = radius
    positions[i3 + 1] = 0
    positions[i3 + 2] = 0
}
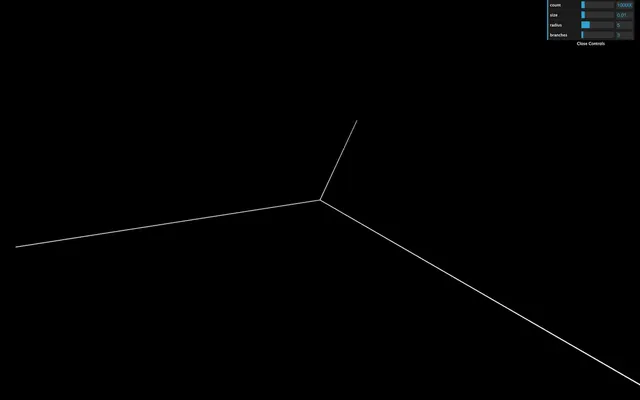
Branches
Spin galaxies always seem to have at least two branches, but it can have much more.
Create a branches parameter:
parameters.branches = 3

// ...

gui.add(parameters, 'branches').min(2).max(20).step(1).onFinishChange(generateGalaxy)
We can use Math.cos(...) and Math.sin(...) to position the particles on those branches. We first calculate an angle with the modulo (%), divide the result by the branches count parameter to get an angle between 0 and 1, and multiply this value by Math.PI * 2 to get an angle between 0 and a full circle. We then use that angle with Math.cos(...) and Math.sin(...) for the x and the z axis and we finally multiply by the radius:
for(let i = 0; i < parameters.count; i++)
{
    const i3 = i * 3

    const radius = Math.random() * parameters.radius
    const branchAngle = (i % parameters.branches) / parameters.branches * Math.PI * 2

    positions[i3    ] = Math.cos(branchAngle) * radius
    positions[i3 + 1] = 0
    positions[i3 + 2] = Math.sin(branchAngle) * radius
}
Spin
Let's add the spin effect.
Create a spin parameter:
parameters.spin = 1

// ...

gui.add(parameters, 'spin').min(- 5).max(5).step(0.001).onFinishChange(generateGalaxy)
Then we can multiply the spinAngle by that spin parameter. To put it differently, the further the particle is from the center, the more spin it'll endure:
for(let i = 0; i < parameters.count; i++)
{
    const i3 = i * 3

    const radius = Math.random() * parameters.radius
    const spinAngle = radius * parameters.spin
    const branchAngle = (i % parameters.branches) / parameters.branches * Math.PI * 2

    positions[i3    ] = Math.cos(branchAngle + spinAngle) * radius
    positions[i3 + 1] = 0
    positions[i3 + 2] = Math.sin(branchAngle + spinAngle) * radius
}
Randomness 44:37
Those particles are perfectly aligned. We need randomness. But what we truly need is spread stars on the outside and more condensed star on the inside.
Create a randomness parameter:
parameters.randomness = 0.2

// ...

gui.add(parameters, 'randomness').min(0).max(2).step(0.001).onFinishChange(generateGalaxy)
Now create a random value for each axis with Math.random(), multiply it by the radius and then add those values to the positions:
for(let i = 0; i < parameters.count; i++)
{
    const i3 = i * 3

    const radius = Math.random() * parameters.radius

    const spinAngle = radius * parameters.spin
    const branchAngle = (i % parameters.branches) / parameters.branches * Math.PI * 2

    const randomX = (Math.random() - 0.5) * parameters.randomness * radius
    const randomY = (Math.random() - 0.5) * parameters.randomness * radius
    const randomZ = (Math.random() - 0.5) * parameters.randomness * radius

    positions[i3    ] = Math.cos(branchAngle + spinAngle) * radius + randomX
    positions[i3 + 1] = randomY
    positions[i3 + 2] = Math.sin(branchAngle + spinAngle) * radius + randomZ
}
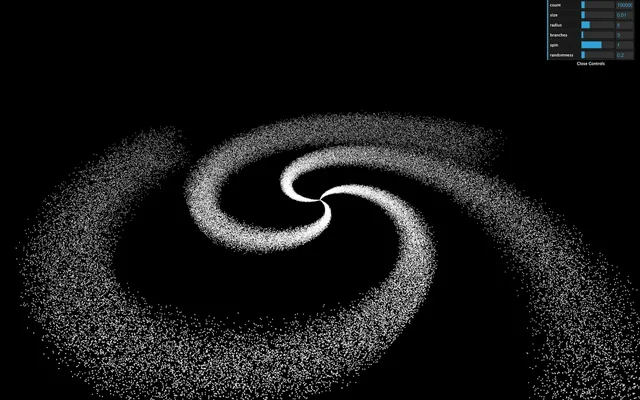
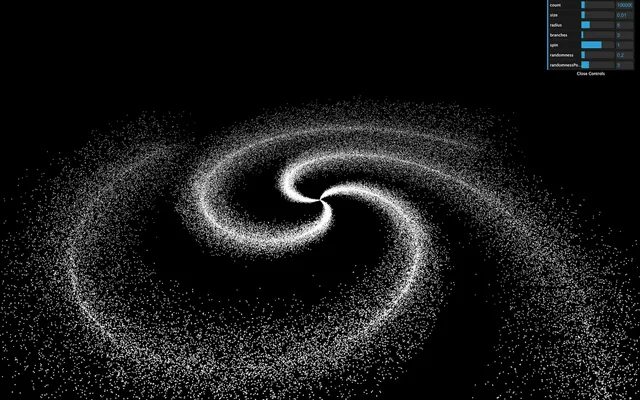
It's working but it's not very convincing, right? And we can still see the pattern. To fix that, we can use Math.pow() to crush the value. The more power you apply, the closest to 0 it will get. The problem is that you can't use a negative value with Math.pow(). What we will do is calculate the power then multiply it by -1 randomly.
First create the power parameter:
parameters.randomnessPower = 3

// ...

gui.add(parameters, 'randomnessPower').min(1).max(10).step(0.001).onFinishChange(generateGalaxy)
Then apply the power with Math.pow() and multiply it by -1 randomly:
const randomX = Math.pow(Math.random(), parameters.randomnessPower) * (Math.random() < 0.5 ? 1 : - 1) * parameters.randomness * radius
const randomY = Math.pow(Math.random(), parameters.randomnessPower) * (Math.random() < 0.5 ? 1 : - 1) * parameters.randomness * radius
const randomZ = Math.pow(Math.random(), parameters.randomnessPower) * (Math.random() < 0.5 ? 1 : - 1) * parameters.randomness * radius
Colors 56:58
For a better effect, we need to add some colors to our creation. A cool thing would be to have different colors inside the galaxy and on its edges.
First, add the colors parameters:
parameters.insideColor = '#ff6030'
parameters.outsideColor = '#1b3984'

// ...

gui.addColor(parameters, 'insideColor').onFinishChange(generateGalaxy)
gui.addColor(parameters, 'outsideColor').onFinishChange(generateGalaxy)
We're going to provide a color for each vertex. We must active the vertexColors on the material:
material = new THREE.PointsMaterial({
    size: parameters.size,
    sizeAttenuation: true,
    depthWrite: false,
    blending: THREE.AdditiveBlending,
    vertexColors: true
})
Then add a color attribute on our geometry just like we added the position attribute. For now, we're not using the insideColor and outsideColor parameters:
geometry = new THREE.BufferGeometry()

const positions = new Float32Array(parameters.count * 3)
const colors = new Float32Array(parameters.count * 3)

for(let i = 0; i < parameters.count; i++)
{
    // ...

    colors[i3    ] = 1
    colors[i3 + 1] = 0
    colors[i3 + 2] = 0
}

geometry.setAttribute('position', new THREE.BufferAttribute(positions, 3))
geometry.setAttribute('color', new THREE.BufferAttribute(colors, 3))
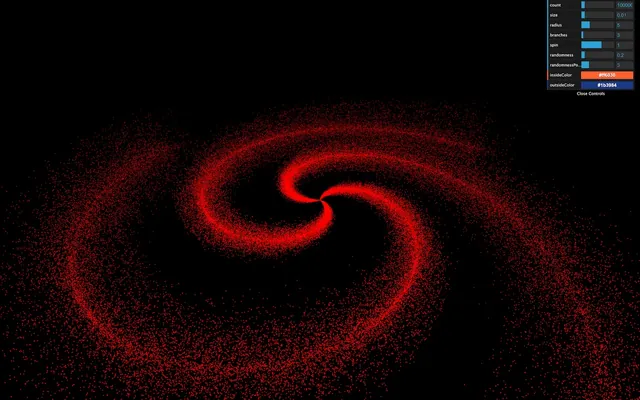
You should get a red galaxy.
To use the colors from the parameters, we first need to create a Color instance for each one. We have to do it inside the generateGalaxy function for reasons you'll understand in a bit:
const generateGalaxy = () =>
{
    // ...

    const colorInside = new THREE.Color(parameters.insideColor)
    const colorOutside = new THREE.Color(parameters.outsideColor)

    // ...
}
Inside the loop function, we want to mix these colors into a third color. That mix depends on the distance from the center of the galaxy. If the particle is at the center of the galaxy, it'll have the insideColor and the further it gets from the center, the more it will get mixed with the outsideColor.
Instead of creating a third Color, we are going to clone the colorInside and then use the lerp(...) method to interpolate the color from that base color to another one. The first parameter of lerp(...) is the other color, and the second parameter is a value between 0 and 1. If it's 0, the color will keep its base value, and if it's 1 the result color will be the one provided. We can use the radius divided by the radius parameter:
const mixedColor = colorInside.clone()
mixedColor.lerp(colorOutside, radius / parameters.radius)
We can then use the r, g and b properties in our colors array:
colors[i3    ] = mixedColor.r
colors[i3 + 1] = mixedColor.g
colors[i3 + 2] = mixedColor.b
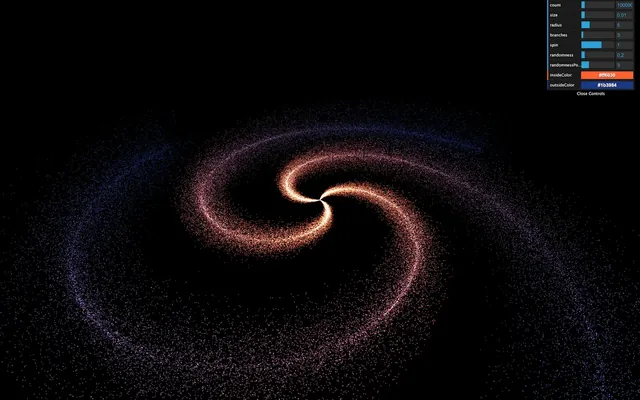
And here you have a beautiful galaxy generator. You can play with the tweaks and continue to add parameters and improve the style of your galaxies.
Try not to burn your computer.
Go further 01:06:59
To go further, you can try to add more tweaks or test other galaxy shapes. We will learn how to animate all the particles in a cool spin animation in a future lesson.